Creating a Real-Time Chat Application with Flask and Socket.IO

Kosal Ang
Tue Mar 26 2024
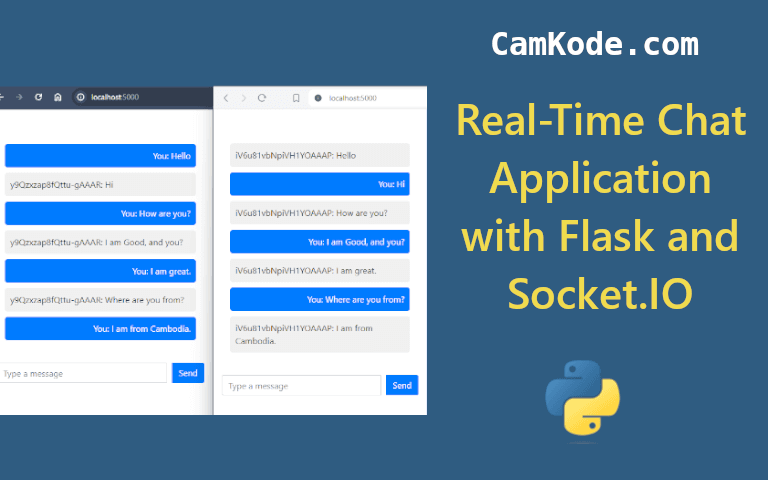
Real-time communication has become an integral part of modern web applications. In this tutorial, we'll walk through the process of building a real-time chat application using Flask, a lightweight web framework for Python, and Socket.IO, a library that enables real-time, bidirectional communication between web clients and servers.
Prerequisites: Before we begin, ensure you have Python installed on your system along with basic knowledge of Python and web development concepts.
Step 1: Setting Up the Environment:
Let's start by setting up our development environment. Open your terminal and create a new directory for your project. Inside the project directory, create a virtual environment to isolate your project's dependencies:
1mkdir flask_chat_app
2cd flask_chat_app
3python3 -m venv venv
4
Activate the virtual environment:
-
On macOS/Linux:
1source venv/bin/activate 2 -
On Windows:
1venv\Scripts\activate
2
Install Flask and Flask-SocketIO using pip:
1pip install Flask Flask-SocketIO
2
Step 2: Creating the Flask Application:
Now, let's create the Flask application. Inside your project directory, create a Python file named app.py. Open app.py and initialize your Flask app along with Socket.IO:
1from flask import Flask, render_template
2from flask_socketio import SocketIO
3
4app = Flask(__name__)
5app.config['SECRET_KEY'] = 'your_secret_key'
6socketio = SocketIO(app, cors_allowed_origins="*")
7
Step 3: Creating the HTML Template:
Next, create an HTML template for your chat interface. Create a file named index.html in your project directory and add the following code:
1<!doctype html>
2<html lang="en">
3  <head>
4    <meta charset="UTF-8" />
5    <meta name="viewport" content="width=device-width, initial-scale=1.0" />
6    <title>Real-Time Chat Application</title>
7    <!-- Bootstrap CSS -->
8    <link
9      rel="stylesheet"
10      href="https://maxcdn.bootstrapcdn.com/bootstrap/4.5.2/css/bootstrap.min.css"
11    />
12    <!-- Custom CSS -->
13    <style>
14      #messages {
15        list-style-type: none;
16        padding: 0;
17      }
18
19      .message {
20        margin-bottom: 10px;
21        padding: 10px;
22        border-radius: 5px;
23      }
24
25      .message.sent {
26        background-color: #007bff;
27        color: #fff;
28        text-align: right;
29      }
30
31      .message.received {
32        background-color: #f0f0f0;
33        color: #000;
34        text-align: left;
35      }
36
37      #message_input {
38        width: 80%;
39        margin-right: 10px;
40      }
41
42      #send {
43        width: 18%;
44      }
45    </style>
46  </head>
47  <body>
48    <div class="container mt-5">
49      <div class="row">
50        <div class="col-md-8 offset-md-2">
51          <ul id="messages" class="p-3"></ul>
52          <form id="form">
53            <div class="input-group mb-3">
54              <input
55                type="text"
56                id="message_input"
57                class="form-control"
58                placeholder="Type a message"
59                aria-label="Type a message"
60                aria-describedby="basic-addon2"
61              />
62              <div class="input-group-append">
63                <button class="btn btn-primary" type="submit">Send</button>
64              </div>
65            </div>
66          </form>
67        </div>
68      </div>
69    </div>
70
71    <!-- Bootstrap JS -->
72    <script src="https://cdnjs.cloudflare.com/ajax/libs/jquery/3.6.0/jquery.min.js"></script>
73    <script src="https://maxcdn.bootstrapcdn.com/bootstrap/4.5.2/js/bootstrap.min.js"></script>
74    <!-- Socket.IO -->
75    <script src="https://cdnjs.cloudflare.com/ajax/libs/socket.io/4.2.0/socket.io.js"></script>
76
77    <script>
78      var socket = io();
79
80      var form = document.getElementById("form");
81      var input = document.getElementById("message_input");
82      var sendButton = document.getElementById("send");
83
84      form.addEventListener("submit", function (e) {
85        e.preventDefault();
86        if (input.value.trim() !== "") {
87          socket.emit("message", {
88            message: input.value,
89            socket_id: socket.id,
90          });
91          input.value = "";
92        }
93      });
94
95      socket.on("message", function (data) {
96        var item = document.createElement("li");
97        if (data.socket_id === socket.id) {
98          item.classList.add("message", "sent");
99          item.textContent = "You: " + data.message;
100        } else {
101          item.classList.add("message", "received");
102          item.textContent = data.socket_id + ": " + data.message;
103        }
104        document.getElementById("messages").appendChild(item);
105        window.scrollTo(0, document.body.scrollHeight);
106      });
107    </script>
108  </body>
109</html>
110
Step 4: Handling Socket.IO Events:
Define Socket.IO events in app.py to handle incoming and outgoing messages:
1@app.route('/')
2def index():
3    return render_template('index.html')
4
5@socketio.on('message')
6def handle_message(data):
7    message = data['message']
8    socket_id = data['socket_id']
9    print(f'Message from {socket_id}: {message}')
10    socketio.emit('message', {'message': message, 'socket_id': socket_id})
11
12
Step 5: Running the Application:
Finally, run the Flask app:
1if __name__ == '__main__':
2    socketio.run(app, host='0.0.0.0', port=5000, debug=True)
3
Preview:

Conclusion: Congratulations! You have successfully built a real-time chat application using Flask and Socket.IO. This application serves as a foundation for more advanced features like user authentication, message persistence, and multiple chat rooms. Experiment with the code, explore additional functionalities, and unleash the full potential of real-time communication in your web applications. Happy coding!
Related Posts

How to Create and Use Virtual Environments
Unlock the full potential of Python development with our comprehensive guide on creating and using virtual environments
How to Perform Asynchronous Programming with asyncio
Asynchronous programming with asyncio in Python allows you to write concurrent code that can handle multiple tasks concurrently, making it particularly useful for I/O-bound operations like web scraping
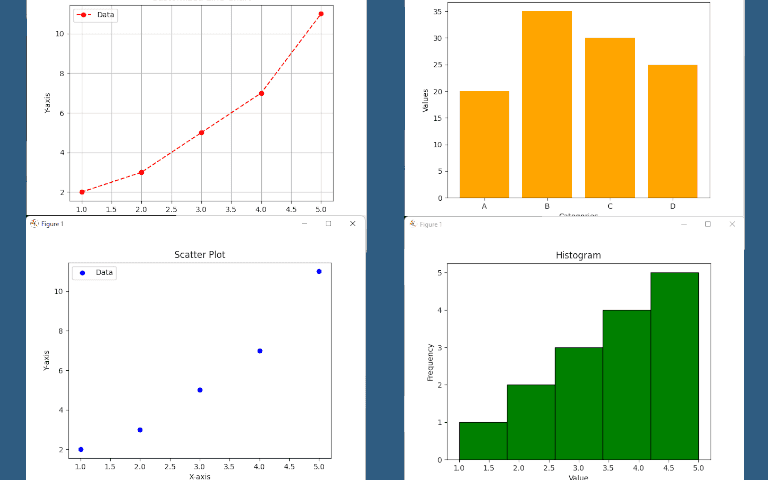
Mastering Data Visualization in Python with Matplotlib
Unlock the full potential of Python for data visualization with Matplotlib. This comprehensive guide covers everything you need to know to create stunning visualizations, from basic plotting to advanced customization techniques.
Building a Secure Web Application with User Authentication Using Flask-Login
Web authentication is a vital aspect of web development, ensuring that only authorized users can access protected resources. Flask, a lightweight web framework for Python, provides Flask-Login

Simplifying Excel File Handling in Python with Pandas
Learn how to handle Excel files effortlessly in Python using the Pandas library. This comprehensive guide covers reading, writing, and manipulating Excel data with Pandas, empowering you to perform data analysis and reporting tasks efficiently.
Creating a Custom Login Form with CustomTkinter
In the realm of Python GUI development, Tkinter stands out as one of the most popular and versatile libraries. Its simplicity and ease of use make it an ideal choice for building graphical user interfaces for various applications.

Building Scalable Microservices Architecture with Python and Flask
Learn how to build a scalable microservices architecture using Python and Flask. This comprehensive guide covers setting up Flask for microservices, defining API endpoints, implementing communication between services, containerizing with Docker, deployment strategies, and more.
FastAPI: Building High-Performance RESTful APIs with Python
Learn how to leverage FastAPI, a modern web framework for building APIs with Python, to create high-performance and easy-to-maintain RESTful APIs. FastAPI combines speed, simplicity, and automatic documentation generation, making it an ideal choice for developers looking to rapidly develop and deploy APIs.
Beginner's Guide to Web Scraping with BeautifulSoup in Python
Learn how to scrape websites effortlessly using Python's BeautifulSoup library. This beginner-friendly guide walks you through fetching webpages, parsing HTML content, and extracting valuable data with ease.

How to Use Python's Regular Expressions (Regex)
Python's re module provides powerful tools for working with regular expressions, allowing you to search, match, and manipulate text data based on patterns.