Creating Real-Time Chat Apps with Node.js and WebSockets
Posted by Kosal
In today’s connected world, real-time communication has become an essential part of modern web applications. Whether it’s messaging between friends, live customer support, or collaborative tools, real-time features are everywhere. In this article, we’ll walk through the process of building a real-time chat application using Node.js, Express, and Socket.IO (a WebSocket library for Node.js).
What You'll Need
To build this chat application, we'll use the following technologies:
- Node.js – JavaScript runtime for the backend
- Express – Minimal and flexible web framework
- Socket.IO – Real-time WebSocket communication library
- HTML/CSS/JavaScript – Frontend interface
Project Structure
Here’s what our project structure will look like:
chat-app/
├── server.js
├── package.json
└── public/
    ├── index.html
    ├── style.css
    └── client.js
Step-by-Step Guide
1. Initialize the Project
First, create a new directory and initialize a Node.js project:
mkdir chat-app && cd chat-app
npm init -y
Now install the required dependencies:
npm install express socket.io
2. Set Up the Server (server.js)
Create a file named server.js:
const express = require('express');
const http = require('http');
const { Server } = require('socket.io');

const app = express();
const server = http.createServer(app);
const io = new Server(server);

// Serve static files from the "public" directory
app.use(express.static('public'));

// WebSocket connection handler
io.on('connection', (socket) => {
  console.log('A user connected:', socket.id);

  // Listen for setting username
  socket.on('set username', (username) => {
    socket.username = username;
  });

  // Listen for chat messages from the client
  socket.on('chat message', (msg) => {
    // Broadcast the message and username to all connected clients
    io.emit('chat message', {
      username: socket.username || 'Anonymous',
      message: msg,
      timestamp: new Date().toLocaleTimeString(),
    });
  });

  socket.on('disconnect', () => {
    console.log('User disconnected:', socket.id);
  });
});

// Start the server
server.listen(3000, () => {
  console.log('Server running on http://localhost:3000');
});
3. Create the Frontend
public/index.html
<!DOCTYPE html>
<html lang="en">
<head>
  <meta charset="UTF-8" />
  <meta name="viewport" content="width=device-width, initial-scale=1.0"/>
  <title>Real-Time Chat</title>
  <link rel="stylesheet" href="style.css" />
</head>
<body>
  <div id="login">
    <input id="usernameInput" placeholder="Enter your username" />
    <button id="joinBtn">Join Chat</button>
  </div>
  <div id="chat" class="hidden">
    <ul id="messages"></ul>
    <form id="form">
      <input id="input" autocomplete="off" placeholder="Type a message..." />
      <button>Send</button>
    </form>
  </div>
  <script src="/socket.io/socket.io.js"></script>
  <script src="client.js"></script>
</body>
</html>
public/style.css
* {
  box-sizing: border-box;
}
body {
  font-family: Arial, sans-serif;
  margin: 0;
  padding: 0;
}
#login {
  display: flex;
  justify-content: center;
  align-items: center;
  height: 100vh;
  background: #f0f0f0;
}
#login input {
  padding: 10px;
  font-size: 16px;
}
#login button {
  padding: 10px;
  margin-left: 10px;
  font-size: 16px;
}
.hidden {
  display: none !important;
}
#messages {
  list-style-type: none;
  padding: 10px;
  margin-bottom: 60px;
}
#form {
  position: fixed;
  bottom: 0;
  width: 100%;
  display: flex;
  background: #f9f9f9;
  padding: 10px;
  box-shadow: 0 -1px 5px rgba(0,0,0,0.1);
}
#input {
  flex-grow: 1;
  padding: 10px;
}
button {
  padding: 10px;
}

.own-message {
  text-align: right;
  background-color: green;
  color: white;
  padding: 8px;
  margin: 5px 10px;
  border-radius: 10px;
  max-width: 70%;
  margin-left: auto;
}

.other-message {
  text-align: left;
  background-color: #f1f0f0;
  padding: 8px;
  margin: 5px 10px;
  border-radius: 10px;
  max-width: 70%;
  margin-right: auto;
}
public/client.js
const socket = io();

const loginDiv = document.getElementById('login');
const chatDiv = document.getElementById('chat');
const usernameInput = document.getElementById('usernameInput');
const joinBtn = document.getElementById('joinBtn');
const form = document.getElementById('form');
const input = document.getElementById('input');
const messages = document.getElementById('messages');

let currentUsername = '';

joinBtn.addEventListener('click', () => {
  const username = usernameInput.value.trim();
  if (username) {
    currentUsername = username;
    socket.emit('set username', username);
    loginDiv.classList.add('hidden');
    chatDiv.classList.remove('hidden');
  }
});

form.addEventListener('submit', (e) => {
  e.preventDefault();
  if (input.value) {
    socket.emit('chat message', input.value);
    input.value = '';
  }
});

socket.on('chat message', ({ username, message, timestamp }) => {
  const item = document.createElement('li');
  const isOwnMessage = username === currentUsername;

  item.className = isOwnMessage ? 'own-message' : 'other-message';
  item.innerHTML = `<strong>[${timestamp}] ${username}:</strong> ${message}`;
  messages.appendChild(item);
  window.scrollTo(0, document.body.scrollHeight);
});
Running the App
To run the application, use the following command in the terminal:
node server.js
Open your browser and go to:
http://localhost:3000
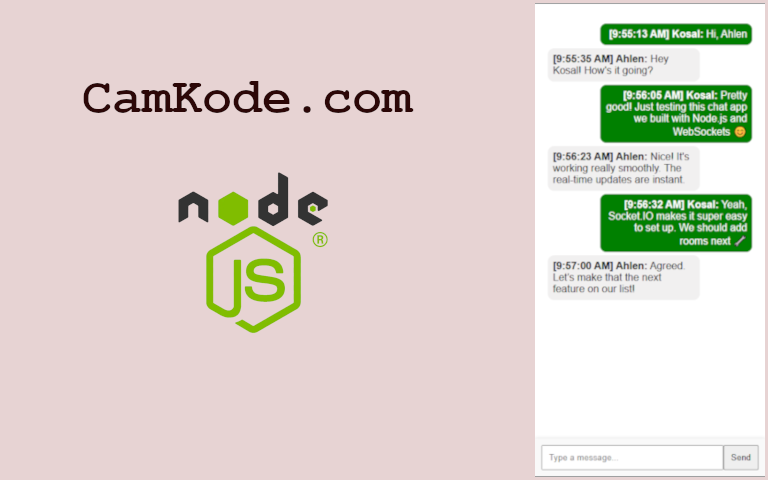
Type in a username to join the chat, and open multiple tabs or devices to see real-time messages with usernames and timestamps.
Features You Can Add
Once you’ve built this version, you can enhance the chat app with:
- Chat rooms or channels
- Private/direct messages
- Typing indicators
- Message history using MongoDB or another database
- Authentication and authorization
Conclusion
Adding usernames and timestamps makes the chat experience more personal and clear. With Node.js and Socket.IO, implementing these features is straightforward. Whether you’re building a community chat, customer support tool, or collaborative platform, this setup offers a robust starting point.
Happy coding!