Creating a Heart Animation in Flutter
Posted by Kosal
Animations can significantly enhance the user experience in mobile applications. One common animation is the heart (love) animation, which is often used to indicate a "like" or "favorite" action. In this article, we'll walk through how to implement a heart animation in Flutter that scales and changes color when pressed.
Prerequisites
Before we start, ensure you have the following:
- Flutter installed on your machine.
- Basic understanding of Flutter widgets and animations.
Step-by-Step Guide
Step 1: Setting Up the Project
Create a new Flutter project or open an existing one. In the lib directory, create a new file named heart_animation.dart.
import 'package:flutter/material.dart';
void main() {
runApp(MyApp());
}
class MyApp extends StatelessWidget {
@override
Widget build(BuildContext context) {
return MaterialApp(
home: Scaffold(
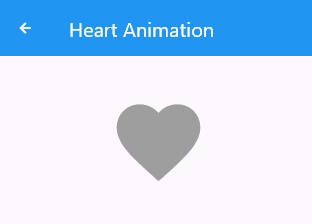
appBar: AppBar(
title: Text('Heart Animation Example'),
),
body: Center(
child: HeartAnimation(),
),
),
);
}
}
Step 2: Creating the HeartAnimation Widget
In the heart_animation.dart file, define a new stateful widget named HeartAnimation. This widget will contain the animation logic.
class HeartAnimation extends StatefulWidget {
  @override
  _HeartAnimationState createState() => _HeartAnimationState();
}

class _HeartAnimationState extends State<HeartAnimation> with SingleTickerProviderStateMixin {
  late AnimationController _controller;
  late Animation<double> _scaleAnimation;
  late Animation<Color?> _colorAnimation;
  bool _isLiked = false;

  @override
  void initState() {
    super.initState();
    _controller = AnimationController(
      vsync: this,
      duration: Duration(milliseconds: 300),
    );

    _scaleAnimation = TweenSequence([
      TweenSequenceItem(tween: Tween(begin: 1.0, end: 1.3).chain(CurveTween(curve: Curves.easeIn)), weight: 50),
      TweenSequenceItem(tween: Tween(begin: 1.3, end: 1.0).chain(CurveTween(curve: Curves.easeOut)), weight: 50),
    ]).animate(_controller);

    _colorAnimation = ColorTween(begin: Colors.grey, end: Colors.red).animate(_controller);
  }

  @override
  void dispose() {
    _controller.dispose();
    super.dispose();
  }

  void _handleTap() {
    if (_isLiked) {
      _controller.reverse();
    } else {
      _controller.forward();
    }
    setState(() {
      _isLiked = !_isLiked;
    });
  }

  @override
  Widget build(BuildContext context) {
    return GestureDetector(
      onTap: _handleTap,
      child: AnimatedBuilder(
        animation: _controller,
        builder: (context, child) {
          return Transform.scale(
            scale: _scaleAnimation.value,
            child: Icon(
              Icons.favorite,
              color: _colorAnimation.value,
              size: 100,
            ),
          );
        },
      ),
    );
  }
}
Step 3: Integrating the Animation
In the main lib/main.dart file, import the heart_animation.dart file and use the HeartAnimation widget.
import 'package:flutter/material.dart';
import 'heart_animation.dart'; // Adjust the import based on your file structure

void main() {
  runApp(MyApp());
}

class MyApp extends StatelessWidget {
  @override
  Widget build(BuildContext context) {
    return MaterialApp(
      home: Scaffold(
        appBar: AppBar(
          title: Text('Heart Animation Example'),
        ),
        body: Center(
          child: HeartAnimation(),
        ),
      ),
    );
  }
}
Explanation
- AnimationController: Manages the animation.
- TweenSequence: Defines a sequence of tweens for scaling the heart icon. It scales up and then back to its original size.
- ColorTween: Animates the color change from grey to red.
- AnimatedBuilder: Rebuilds the widget when the animation changes.
- GestureDetector: Detects taps to start or reverse the animation.
Customization
You can adjust the following parameters to customize the animation:
- Duration: Change the duration in the
AnimationControllerfor faster or slower animations. - Colors: Modify the
ColorTweento use different colors. - Scale: Adjust the scaling values in the
TweenSequencefor larger or smaller scaling effects.
Conclusion
By following this guide, you have successfully created a heart animation in Flutter. This animation scales the heart icon and changes its color when tapped, providing a visually appealing effect for users. Feel free to customize the animation to better suit your application's design and requirements.